Cabinet installation is the process of setting and fastening boxes to walls and floors so that every door, drawer, and countertop seam lines up and stays aligned for the life of the kitchen. The single thing that decides whether cabinets hang straight and doors stay flush is what the installer does before a single screw goes in: finding the high point of the floor and a level layout line, then shimming every box back to plumb and level against walls that are never truly flat. Get the layout and shimming right and the doors self-align; skip them and the reveals run crooked, drawers rub, and the countertop sits on an unlevel base. A run is leveled to roughly 1/16" over the full length before anything is screwed home.
Cabinet Installation Is a Layout Job First, a Hanging Job Second
The boxes themselves are the part everyone photographs and the part that forgives the least once they are wrong. Hanging a cabinet is fast, repeatable work for a trained crew. What separates a kitchen where every door reveal is a clean, even line from one where the gaps wander is everything that happens before the first box touches the wall: finding the highest point of the finished floor, snapping a level layout line for the wall cabinets, locating the studs, and confirming the walls are plumb enough to shim against.
That is why a credible installer spends real time on layout before lifting a box. Houses are not built to cabinet tolerances. Floors slope, walls bow, and corners are rarely a true ninety degrees. A base cabinet set to a sloping floor with no shimming will pitch the countertop and leave the toe-kick proud at one end. A wall cabinet hung to a crooked ceiling line instead of a level line will throw every door reveal in the run out of parallel. None of those are cabinet defects. They are layout and setting failures, and they are the most common reason a new kitchen looks subtly off even when the cabinets themselves are excellent. The visible box is the easy part; the layout is the job.
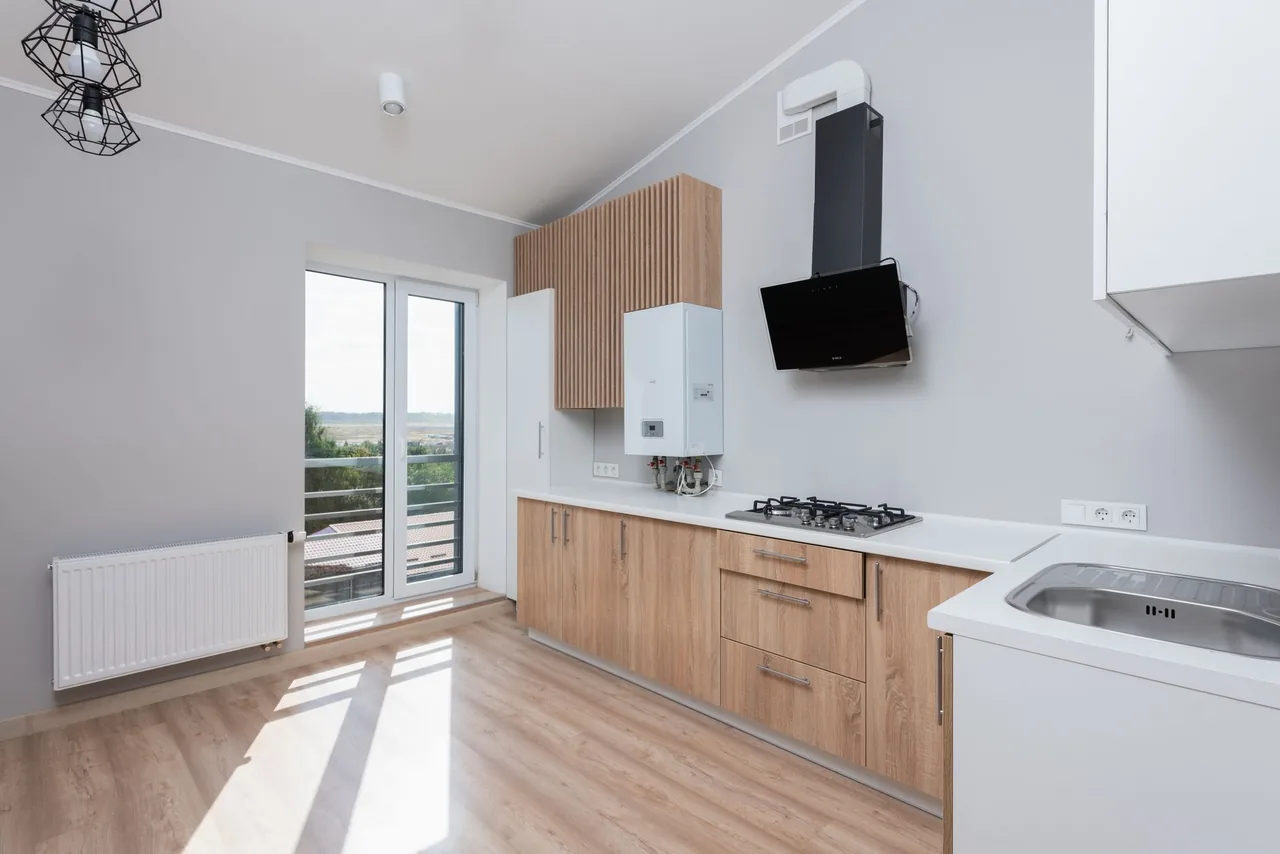
This holds across every construction and style. Whether you are setting Shaker, flat-panel slab, solid wood, or fully custom cabinetry, the layout dictates whether the doors land flush and the counter sits flat. The order of operations never changes: layout, then boxes.
Why Doors Run Crooked, Drawers Rub, and Counters Rock — and How the Setup Stops It
Most cabinet-install failures trace back to two things — an unlevel base and boxes that were never pulled to plumb — and nearly all of them are preventable at setting. Understanding the mechanism is the difference between buying cabinets and buying a kitchen that lines up.
Crooked, uneven door reveals are the most visible failure. When adjacent boxes are not in the same plane and not plumb to each other, the gaps between doors widen at the top and pinch at the bottom, or wander side to side. On frameless (full-access European) cabinets the reveal is tiny and the door covers almost the entire box, so any misalignment is glaring; on framed cabinets the face frame hides a little more, but a crooked run still reads wrong. The fix is not adjusting hinges at the end — it is setting the boxes coplanar and plumb in the first place. Drawers that rub or won't close come from a box racked out of square during fastening: overtightened screws pull a side panel inward, the opening goes out of parallel, and the slides bind. A countertop that rocks or shows a gap at the wall is a base-leveling failure — the run was never brought to a common level line, so the counter bridges high and low boxes and never sits flat.
The prevention for all three is unglamorous and non-negotiable. Establish the floor's high point and work level off it, shimming low boxes up to the line rather than forcing them down. Pull each box to plumb with tapered shims behind it at every stud before driving the screws. Clamp adjacent face frames or box sides flush and coplanar before fastening them to each other, and fasten through the thick mounting rail into solid framing — never snug a screw so hard it bows the cabinet side. Skip any one of these and the kitchen will tell on the installer the first time someone sights down the run.
The Box, the Studs, and What Cabinets Actually Hang On
Before a single cabinet goes up, a competent installer answers two questions: is the box itself built to hold a load and a fastener, and is there solid framing behind the wall to carry it. Both are where corners get cut on cheap jobs, and both decide whether a loaded upper cabinet stays on the wall.
Box material is the first gate. Cabinet sides are typically plywood or particleboard/MDF, and the difference matters most exactly where the cabinet is fastened. Plywood holds a screw far better than particleboard because its cross-laminated layers resist pull-out, which is why a plywood box is worth specifying for wall cabinets and anything that carries weight — a full upper of dishes is a real load hanging off a few fasteners. Particleboard and MDF boxes can perform well when the mounting rail is thick and the screws hit studs, but they are less forgiving of an overdriven screw or a fastener that misses framing. A thin, stapled hanging rail is a quiet sign of a budget box; a thick, solid rail across the back is what a heavy fastener schedule needs.
Framing is the second gate, and it is non-negotiable for safety. Wall cabinets must be screwed through the back rail into wall studs with structural cabinet screws — not drywall anchors, which will eventually let go under a loaded box. The installer locates and marks every stud, hangs the cabinet on the layout line, and drives at least two screws per stud through the rail into solid wood. Where a stud does not fall behind a fastening point, the answer is solid blocking added inside the wall, not a longer drywall anchor. A wall cabinet that comes down does so almost always because it was hung on anchors instead of studs.
Base cabinets carry their load to the floor, but they still get fastened to the wall to hold position and to keep the run from creeping as the counter and appliances go in. They are screwed through the back into studs after leveling, with the shims locked in place so nothing settles. For the surface that lands on top of all this, see countertops — the level of the base run is exactly what the fabricator templates against.
Overlay, Reveals, and the Hardware That Makes Doors Land Right
How the doors sit on the boxes — and the hinges and slides behind them — is as consequential as the boxes themselves, because this is where alignment is dialed in and where quality is felt every day. Three things govern the result.
- Door overlay is how much of the box face the door covers, and it sets the look and the alignment tolerance. Full overlay doors cover almost the entire face for a near-seamless modern front and leave only a thin reveal — beautiful, but unforgiving of a crooked box. Partial overlay leaves more face frame showing and hides minor misalignment. Inset doors sit flush inside the face frame, the most demanding fit of all: the gap around every door must be perfectly even, which is achievable only on dead-square boxes set dead-plumb. The overlay you choose raises or lowers how precise the install has to be.
- Concealed hinges (the European cup hinge) are what make modern doors adjustable. A quality six-way concealed hinge lets the installer move each door up/down, in/out, and side to side after the boxes are set, so reveals are fine-tuned to a hair. This adjustment is the last step, not a substitute for a level install — you can dial out a small error, not rescue a racked box. Soft-close versions add a damper that pulls the door shut quietly over the last inch.
- Drawer slides decide how drawers feel and how much weight they carry. Soft-close undermount slides hide beneath the drawer box, support full extension and higher load ratings, and damp the close — the standard for quality cabinetry. Side-mount slides are visible inside the box and generally carry less. The slide only performs if the box opening is square and the two slides are perfectly parallel, which loops straight back to setting the box without racking it.
The right combination is dictated by the style and the budget — inset with concealed soft-close hinges for a furniture-grade look, full overlay for a clean modern run. None of it disguises a crooked install; good hardware perfects a good setup and merely advertises a bad one. For the doors and fronts themselves across styles, start from the cabinets hub.
Choosing the Construction for the Room — Framed, Frameless, and the Box Behind the Door
The best cabinet for a room is the one matched to how the space is used, how it is built, and how it will be finished — and the construction choice drives storage, look, and how the install runs. Buying on door style alone, ignoring the box, is how a good-looking kitchen ends up with weak storage or fasteners that won't hold.
- Framed construction bolts a solid face frame to the front of the box, the traditional American method. The frame adds rigidity, gives a strong, forgiving surface to fasten and shim against, and supports partial, full, or inset overlay. The trade-off is the frame slightly narrows the opening, so drawers and pull-outs are a touch smaller than the box. It pairs naturally with Shaker and traditional looks.
- Frameless (full-access European) construction skips the face frame, so the door mounts directly to the box and you get the full interior width — more usable storage and wider drawers. The look is clean and modern and suits flat-panel slab doors. The trade-off is precision: with no frame to hide behind, the boxes must be set perfectly coplanar and plumb, which makes installer skill more decisive than with framed cabinets.
- Box material sits underneath both. Solid wood doors over a plywood box give the best screw-holding and longevity; MDF boxes and doors are stable and ideal under paint; thermofoil wraps an MDF door in a seamless, wipeable film. The door material sets the finish; the box material sets how well the cabinet holds a fastener and a load.
- Drawer box construction is the quiet quality tell. Dovetail-joined solid-wood drawer boxes interlock and stay tight under years of loading; stapled or glued butt-joint boxes loosen and rack over time. A dovetail box on an undermount soft-close slide is the combination that still works smoothly a decade in.
Room context overrides preference. Kitchen cabinets take the heaviest daily use and the most weight, so box strength and drawer hardware matter most. Bathroom cabinets live in humidity and want moisture-tolerant materials and finishes. A laundry room needs durable utility storage, a garage wants rugged boxes that shrug off temperature swings, and a closet or home office built-in is judged on fit and finish. Pick the construction for the room and the load first, then choose the look you love inside that constraint.

The Cabinet Installation Process, Step by Step
A professional install runs the same disciplined sequence every time. Each step exists to prevent a specific failure, and skipping any of them shows up later in a crooked reveal or a rocking counter.
- On-site assessment and measure. The installer checks the room dimensions against the cabinet layout, inspects wall plumb and floor slope, confirms appliance and plumbing rough-ins land where the boxes expect them, and flags anything that needs adjustment before a box is opened.
- Find the high point and snap layout lines. Using a laser or level, the installer finds the highest point of the finished floor, measures up to set a level base line, and snaps a level line for the wall cabinets — the reference everything is set to, regardless of how the floor and ceiling run.
- Locate and mark studs. Every stud behind the run is found and marked so wall cabinets fasten into solid framing, with blocking noted where a fastening point misses a stud.
- Set wall cabinets first. Uppers go up before bases so the crew can work without reaching over base cabinets — hung on the level line, shimmed to plumb behind each stud, clamped flush to neighbors, and screwed through the rail into framing.
- Set and level base cabinets. Bases are set to the level line, shimmed up from the high point so the whole run shares one plane, clamped face-to-face coplanar, fastened to studs, and checked for square so drawers will track.
- Hang doors and drawers and dial in reveals. Doors go on their concealed hinges and drawers on their slides, then every reveal is fine-tuned with the hinge adjustments until the gaps run even across the run.
- Toe-kicks, fillers, trim, and hardware. Toe-kick and scribe fillers are cut to the wall and floor, crown or light rail is added where specified, and knobs and pulls are drilled to a consistent template.
- Cleanup and walkthrough. The site is cleaned, the installer operates every door and drawer with you, confirms the run is level for the countertop template, and reviews care and adjustment instructions.
Talk through your project — free.
A free consultation and a written, itemized quote from a vetted installer. No pressure, no obligation.
Warranty Conditions, Standards, and When a Permit Applies
A manufacturer's warranty on cabinets is a contract with conditions, and most denials are not about the product — they are about how it was installed and handled. Read the conditions before the install, because the installer has to meet them or the coverage evaporates the day the boxes go up.
The usual conditions are specific: cabinets must be installed level and plumb to the maker's tolerance; fasteners must hit framing or approved blocking; boxes must not be modified in ways that compromise the structure; and the cabinets must live in a conditioned space, because wood and MDF react to humidity and temperature extremes. An installer who hangs uppers on drywall anchors, racks a box square out with overdriven screws, or sets cabinets in an unconditioned space has, in effect, voided the warranty before you ever notice a problem. This is one more reason the cheapest quote is rarely the cheapest kitchen — ask, in writing, that the install follow the manufacturer's published instructions, because that is the document a warranty claim is judged against.
Standards round out the bar. The KCMA (Kitchen Cabinet Manufacturers Association) sets the ANSI/KCMA A161.1 performance standard cabinets are tested against for structural integrity and finish, and a credible installer follows the manufacturer's instructions that reference it. Cabinets built and set to these standards are the ones that keep their doors aligned and their warranty intact.
Permits enter the picture when the work goes beyond setting boxes. Hanging new cabinets in the same footprint usually does not require one. But moving plumbing or gas, adding or relocating electrical circuits and outlets, or altering walls as part of a larger kitchen remodel typically does, and an inspection may be required for the trades involved. A reputable installer will tell you when a permit applies and coordinate the licensed trades, rather than working around it — and questions about what the finished run will cost across constructions belong in our cost guides before the boxes are even ordered.
How to Vet a Cabinet Installer
Most cabinet failures are install failures, so the installer matters as much as the brand on the box. These are the questions that separate a crew that sets cabinets to last from one that simply hangs boxes fast.
- They find the floor's high point and work to a level line
- An installer who sets bases straight to the floor is building in a sloped countertop. Ask how they establish level — a real answer names finding the high point and snapping a level line, not "the floor looked flat."
- They fasten uppers into studs or blocking, never drywall anchors
- Ask exactly what holds the wall cabinets up. A credible answer is structural cabinet screws into studs, with blocking added where a stud is missing — anyone who says "heavy-duty anchors" for a loaded upper is a red flag.
- They shim every box to plumb and set the run coplanar
- The right installer explains shimming behind each box and clamping faces flush before fastening, so reveals run even. A crew that screws boxes tight to a bowed wall and adjusts hinges to compensate is hiding a problem, not solving it.
- They install to the manufacturer's instructions in writing
- Level-and-plumb tolerance, approved fasteners, not modifying the structure, conditioned-space requirement — these protect your warranty. A professional follows them and will put that commitment in the quote.
- They handle fillers, scribes, and the countertop hand-off cleanly
- Ask how they scribe cabinets to wavy walls, how toe-kicks and fillers are finished, and whether the run is checked level for the counter fabricator. The details at the edges and the hand-off are where rushed work shows.
A Real Cabinet Decision
The clearest way to see why layout decides everything is to walk through one representative scenario where the room, not the cabinets, drove every call.
Our Cabinet Installation Standards
Pro Work Home Surface is not a contractor and does not hang your cabinets — we match you with vetted local installers and hold them to a published bar. These are the standards we expect on every cabinet project we connect.
- Level the run before you fasten a box
- The floor's high point is found and the whole run is shimmed to one level line — bases and uppers — before anything is screwed home, so doors align and the countertop sits flat.
- Fasten into framing, every time
- Wall cabinets are screwed through a solid rail into studs or added blocking with structural cabinet screws, never drywall anchors, so a loaded upper stays on the wall for good.
- Install to the manufacturer's instructions
- Level-and-plumb tolerance, approved fasteners, square boxes, and a conditioned space are followed as written, so the work meets the conditions your warranty depends on.
Every connection starts the same way: a free consultation and a written, itemized quote from a vetted installer, with no obligation. If your project also involves refacing, painting, or refinishing existing cabinets, the same standards apply — and you can compare what each path costs in our cost guides and see which makers fit your kitchen in our brand overviews before you decide. Cabinets are one of eight categories we cover across home surfaces; start from the cabinets hub to see where your project fits.
Brands & Material Authority
Quality and construction drive long-term performance more than the label. These are widely respected names in this category:
- KraftMaid
- Merillat
- Diamond
- Wellborn
- American Woodmark
- Thomasville